Women-owned small business prioritizes sustainable practices
Average Reviews
Description
ABOUT
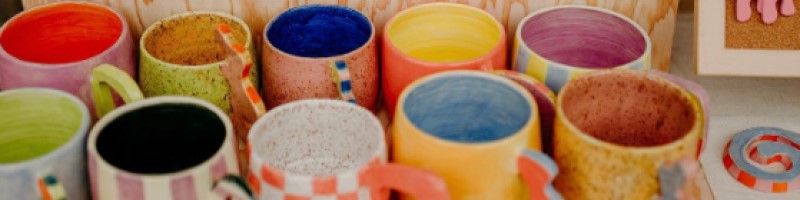
Hi I'm Steph! Every wobbly piece here is one of a kind and handmade by me in California with lots of love, time, and care.
I love creating functional and sculptural pieces that explore color, form, and texture (and sometimes also cuteness). Thanks for following along and supporting me and my ceramics journey!
Process and Practice
Wobbly Pottery prioritizes sustainable practices– every piece is made at a community studio that makes a conscious effort to conserve water and recycle clay and other materials that go into this process.
For those who are curious, I'll be sharing a bit about my process and the steps that go into making the pieces you see here!
1. Throwing — Functional ware such as mugs, cups, and vases are first thrown on the wheel, where each piece is examined closely and any failed pieces or remaining scraps can be rehydrated and recycled into fresh clay that can be thrown into new pots again!
1b. Sculpting/Hand building– Some pieces I make like dishes, coasters, and fruit friends are not made on the wheel and are instead individually formed by hand. Each little detail is designed with intention and lots of care (and eye strain).
2. Trimming — Once these pieces have a few days to dry out a bit they then go through this process called trimming where any excess clay is removed and the foot of the pot is created. At this stage of the process any attachments like handles can be made and attached!
3. Bisque Firing — After everything is cleaned up and the pieces are completely dried out, they can be fired in the kiln for the first time. This firing is called the bisque fire.
4. Underglazing & Glazing — After the bisque firing, pieces are cleaned up, sanded, and ready to be glazed! For pretty much all of my work, I use a special paint called underglaze that is matte on its own and needs a clear glaze on top to make it nice and glossy. I hand paint on multiple layers of underglaze (one of the most time consuming parts of this process) so the color comes out vibrant and later top it off with a clear glaze. (All underglaze is non toxic and food safe)
5. Glaze firing — The pieces go into the kiln for a second time at a higher temperature for what is called the glaze firing. Once the kiln is unloaded, most pieces are done at this step! Yay!
6. Overglaze and 3rd firing — This last step is very much optional but since I use it for some of my pieces I thought I'd include it still. For some pieces once they are finished and glazed, I apply a luster overglaze that can make pieces look iridescent and/or metallic! This requires an additional firing at a lower temperature. (note that pieces with luster overglaze on them are no longer microwave or dishwasher safe, but at least they're pretty)